Monday 22 February 2016

ZOMBIES!!!!!!!

This was our second game of Zombicide after a highly entertaining game the previous week. I have to admit to being a bit sceptical on first seeing the board but once the game got going i was quickly hooked! It quickly became apparent that team work provided the best opportunity of surviving the Zombie menace.

This scenario involved the survivors having to get to 3 cars at the other end of the table. They had to collect weapons and supplies on the way from buildings they passed but each building could be full of zombies! The Zombies reacted to noise or line of sight when it comes to moving so where possible stealth is the name of the game here.


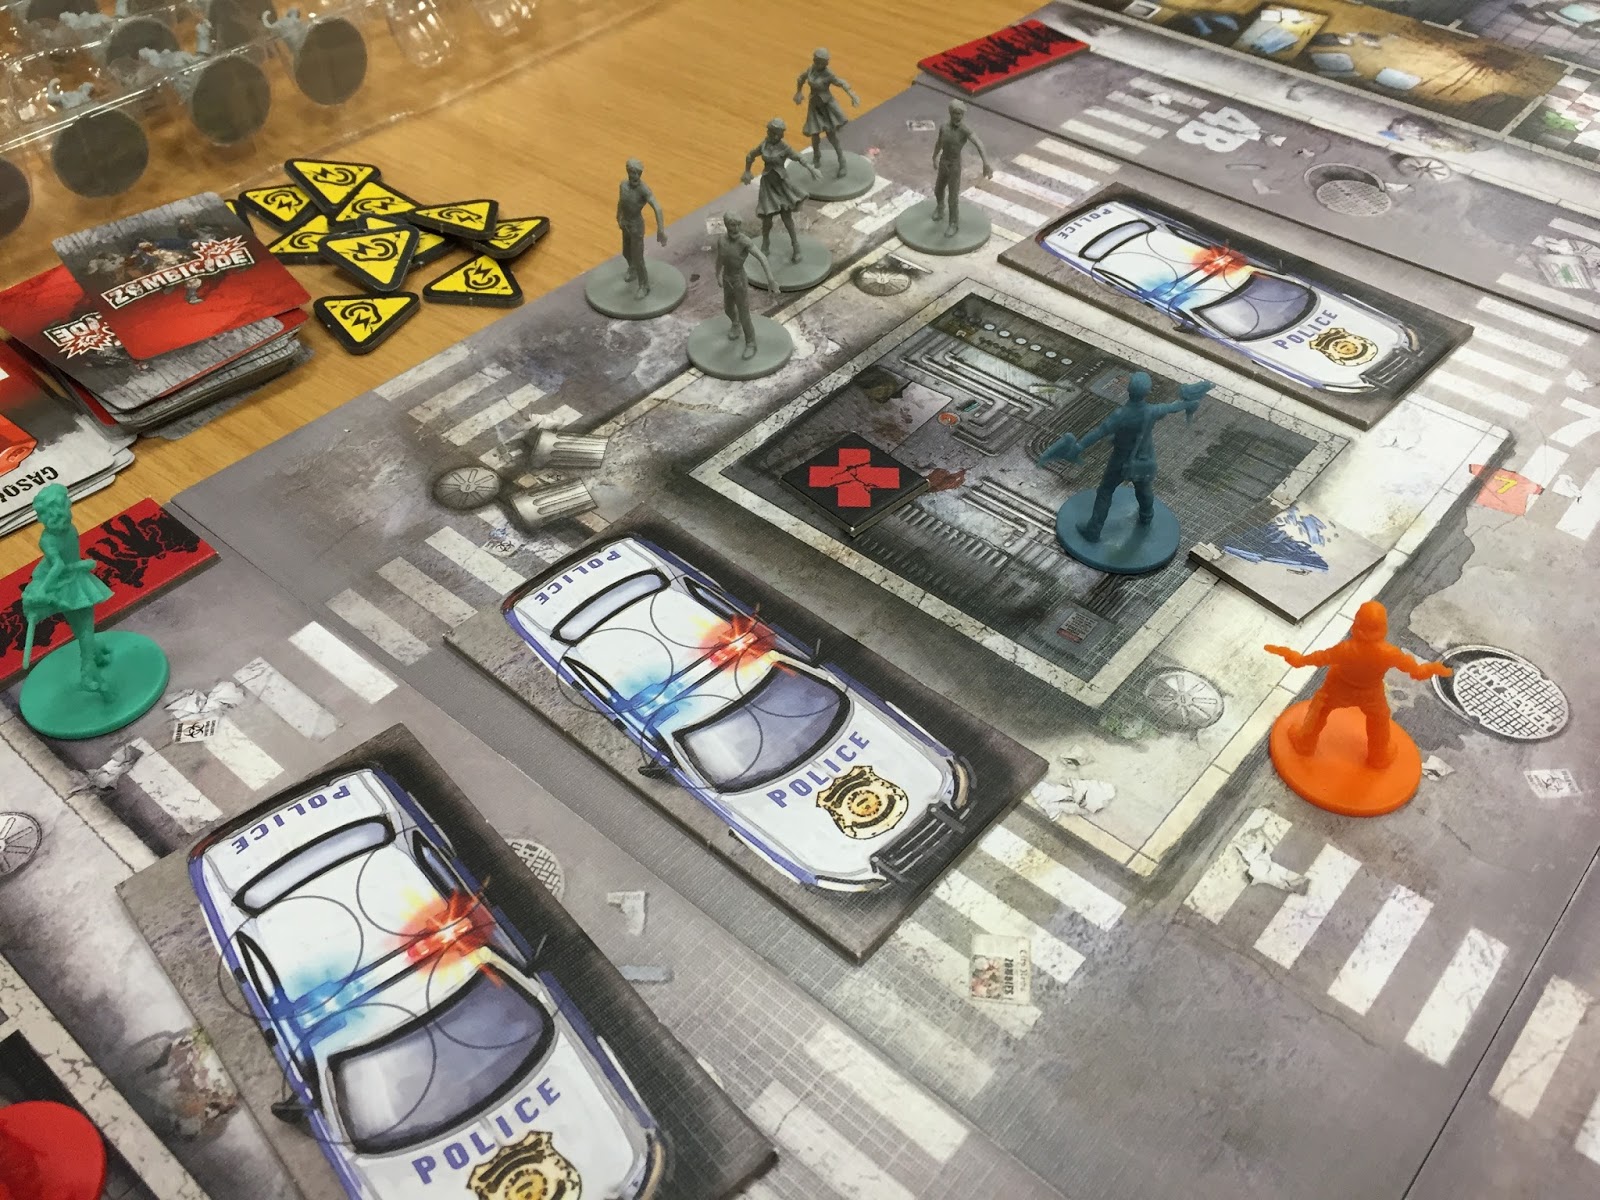
The red tokens mark the points at which Zombies enter the game each turn and their numbers are determined by drawing a card for each entry point. 


The target cars

                                                                                                                                                                                                                                                                                                                                        Each player has a game board on which are placed their cards and a record of each Zombie killed. The more Zombies killed the more actions you gather. The downside is that the further up the colours you go the more Zombies can be activated when their cards are drawn.                                                             ,

The survivors have a minimum of 3 actions and some start with 4. These cam be moves or an action like breaking a door down or entering a building. Most Zombies can only move once but runners can move 2 spaces. Some cards allow all of them to move again.

The humans elected to make a dash for the building between the cars to find the keys and look for weapons and supplies. The red markers represent the car keys. As a survivor has entered the building here, cards are drawn for every room in the building to see how many zombies are hidden there. This is only done one per building.

The blue marker represents the key to the middle building where the car keys are believed to be. 


Zombies are beginning to mass at the entry points and will remain there until they hear noise or see a human.

Three different Zombie types can be seen here, runner nearest one in building, walkers and the fat ones which are more difficult to kill requiring more hits than the other types.

One of these survivors will need to kill the Zombie. You cant leave a square or room which is also occupied by a zombie.


The door having been opened, keys are collected.

Zombies advance towards the humans.

One Zombie down.


This character has quite an armoury and is using the pistol and the formidable chainsaw, it takes an action to swap weapons. This one has killed 3 zombies up to now.

The survivors appear hemmed in.

The Zombies having been cleared the first car is tried. Its the wrong set of keys!!!!


After the last round of fighting Doug is up to 11 kills so more zombies enter when it is their activation.


The yellow tokens represent noise which attracts the Zombies.

The cars having been activated have moved towards the exit but need to pick up survivors and enough supplies to escape.

This side of the board has been virtually cleared of Zombies, Just need to get the lads on board before more Zombies turn up.

The noise has attracted more Zombies.

One car heads for the exit.

Looks like someone is going to be Zombie fodder!!!


The first car escapes off the board.

The second has one of the fat Zombies in its way.

Fortunately the cars can kill any Zombies in their way so this one escapes by mowing down this lot.

So most of the humans escaped with all of the required supplies.


I would highly recommend this game for a good nights entertainment. We used a teamwork approach for this game but i suspect more fun could be had with a go it alone approach. Certainly worth a go i think.

Cheers

Mick


Wednesday 17 February 2016

 We had a game of  Crescent and Cross/Saga at the club using mine Chris and Rory's figures.
We had a 4 way free for all between Saracens which Chris took Normans that i took Crusaders that Rory took and Vikings which Mick took.
 The winner would be decided by points per figure killed.

Warlord = 5 points per figure
Knights/Hirdmen= 2 points per figure
Sergeants/Bondi/Warriors = 1 point per figure
Peasants/Thralls/ = 1 point per 2 figures

 Each side started at a different corner


The Normans


The Vikings


The Crusaders


The Saracens


All four factions advance.


The Saracen cavalry advance towards the Crusader infantry.


Seeing the Crusader cavalry advancing on them the Vikings offer their entire force in response.


Realising that the Vikings attentions are diverted the Normans move in on their flank.


The Normans advance on the Viking rearguard unit.


The Saracen cavalry change targets and move to attack the Crusader cav.


The Saracen warriors and archers move to secure a nearby building.


As the Saracen cavalry advance they are fired upon by the Crusader archers.


And suffer one casualty.


The Crusader cavalry reform to face the oncoming Saracens.


A unit of Norman knights attacks the Viking rearguard.


Killing four but losing two of their own.


The Remaining Vikings are forced back.


The Saracen general and his bodyguard charge the Crusader archers.


One archer is killed without reply.


The generals bodyguards attack the Crusader infantry and manage to kill two but they also lose two in the process.


The remaining infantry finish off the last bodyguard.


Which paves way for the Crusader Lord and his guard to attack the now undefended general.


But the general fights bravely and pushes the enemy back.


The Other unit of Saracen cavalry move to protect their General but are intercepted by a unit of their Crusader counterparts.


The Crusaders inflict one casualty without losing any of their own.


The Viking Warlord and his Hearthguard engage the Norman knights.


The Knights are killed before they can bring their weapons to bear.


The Norman Lord prepares to lead his remaining forces into the battle.


The Norman lord leads the charge into the Viking horde.


He loses two of his knights but kills 3 Vikings in return.


The Norman archers open fire killing another Viking warrior.


The Saracen and Crusader cavalry reengage and the Saracen general also charges into the fray.


Inspired by their general the Saracens emerge victorious, killing 2 Crusaders and losing only one man.


The Saracen general retreats but his men reengage the now heavily outnumbered Crusader cavalry.


The Crusaders amazingly defeat the enemy killing two of their number and forcing them back. 


The Saracen archers occupy a building and take up defencive positions.


The Crusader lord and his bodyguards attack the Saracen general.


The General is defeated but two of his men sacrifice themselves to save him.


The General retreats.


The Norman lord and his knights continue their fight against the Viking Warlord and his Hirdmen.


The Fight goes badly for the Normans as a knight is killed and the Lord is forced to retreat. The Vikings suffer no losses.


Despite horrific odds 2 Viking warriors attack the Norman archers.


But they are easily overwhelmed and killed.


The Viking Warlord and his men attack the last remaining knight.


Easily killing him.


The Saracen cavalry regroups with the infantry.


A unit of Viking warriors attack the Norman archers.


2 Normans are killed and the rest are pushed back. The Vikings lose 1 man.


The Viking warlord tries to attack the Norman Lord but his men form a protective circle around him.3 of the Viking Hirdmen are killed and the warlord is forced to retreat. 1 Norman soldier is killed.


The Norman soldiers quickly attack another unit of Viking warriors


But they are badly beaten losing 4 men without reply.


The Norman archers cover their comrades retreat inflicting 2 casualties on the Vikings.


At this point we ran out of time and after tallying up the points the Normans emerged victorious with the Vikings close behind.

Thanks For Reading

Carl