Sunday, 17 November 2013

We had a Wild West game on Monday using the Legends of the Old West ruleset
The Scenario

A leader of a local gang of outlaws has been caught and is to be escorted to the to the Courtroom/Hotel for trial and naturally his posse arnt to fond of the idea.
The prison wagon waiting for the prisoner.


The Courtroom on the left.


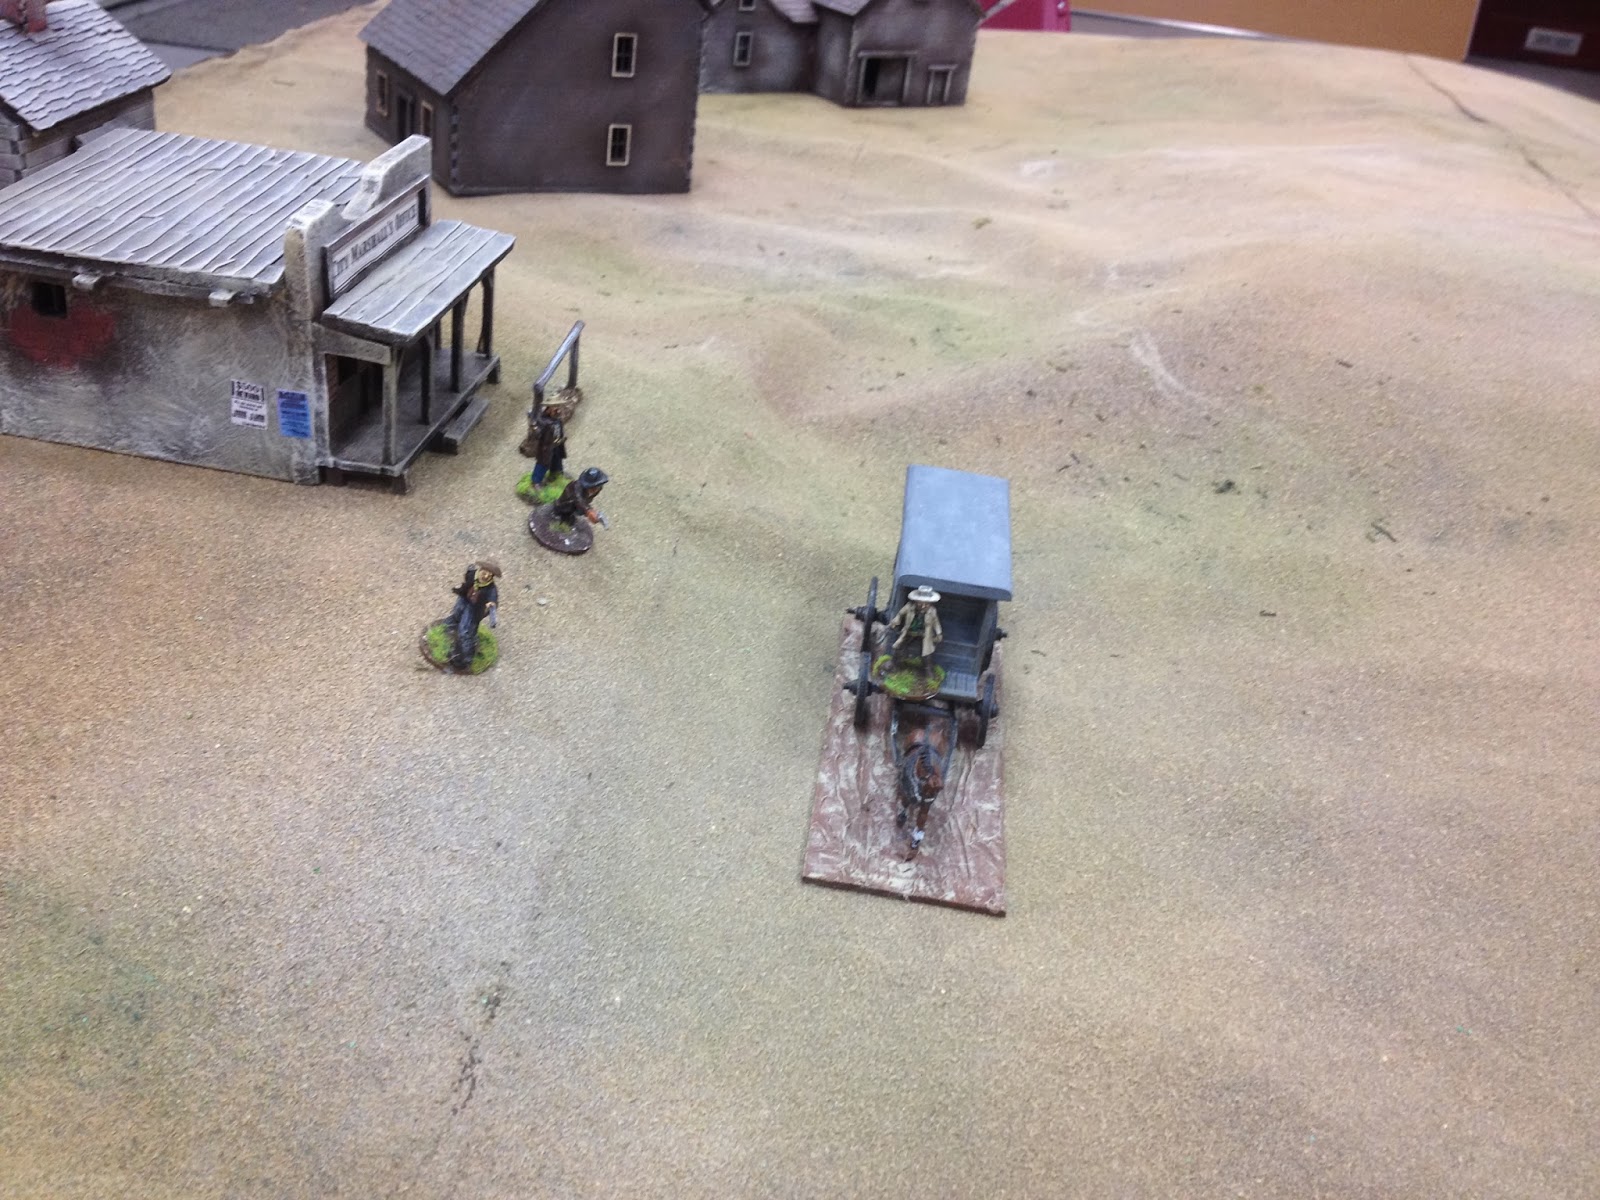
The Earp brothers escort the prisoner to the wagon.


Virgil prepares to drive the wagon.


Suddenly a rifle shot is heard and a bullet whizzes past Virgils head.


He immediatley takes cover behind the wagon with Wyatt and the prisoner while Morgan who had gone ahead to check if the coast was clear turns to help his brothers.


The rifleman comes out of the building to get a better view.


Two outlaws come out of the building closest to Morgan.


But before they can fire he retreats out of view.


Wyatt and Virgil load up the prisoner.


 An outlaw bursts from the Land Agents building.


While one of his comprades takes position by the Undertakers. 


Morgan takes out one of the outlaws. 


The prison wagon prepares for the short trip to the courtroom. 


More bandits emerge. 


An outlaw is surprise to find the townsfolk emerging in his rear to assist the Earps! 


 Additional townsfolk ready to help.


As firing intensifies more outlaws break cover. 


The advance on the jail gathers pace with the locals in hot pursuit firing to no effect. 


One of them is not too keen to help. 


Good cover is afforded by the wagons. 


while the baddies gang up on a helpless citizen. 


Our helpless citizen has an outlaws 6 gun emptied into him! 


The victorious outlaw starts the process of reloading 


His buddy attempted the same but is left wanting in the Gunslinging department and frantically tries to reload. 


Unable to reload quickly enough an outlaw is attacked by two townfolk. 


He is beaten but manages to escape with his life for now. 


Townsfolk take cover behind the wagon. 


Fire is exchanged with the Earps through the bars of the jail. 


The outlaw runs for his life as he is pursued by four townspeople. 


As 2 outlaws attack the jail another 3 are taken in the rear by Morgan. 


Morgan takes fir from 2 outlaws and retreats into the Undertakers. 


leaving the outlaws free to attack the jail. 


 The outlaws continue to assault the jail exchangeing fire with the Earps inside. 


The townsfolk continue to pursue the outlaw who turns and attempts to reload. 


 Virgil manages to kill one of the outlaws outside the jail.


The outlaw manages to reload but is gunned down before he can get a shot off. 


 Positions at the end of the game the outlaws had the bank surrounded although the Earps were pretty secure inside and the townsfolk were coming to help so it is likely the outlaws would have lost this one had we had more time.

A very enjoyable game.


On Monday we will be having our Annual General Meeting but we are hoping to get a game of wings of war in afterwards.


Thanks For Reading


Carl


Wednesday, 6 November 2013

Rolica scenario


Well almost!

This is the Rolica scenario from Albion Triumphant but with different units. The British attacked the outnumbered French defending high ground. The going was very hard restricting movement to half. As a result all cavalry had to throw to test for disorder at the start of each move, a 5 or 6 resulting in disorder. This rule played a significant part in restricting cavalry operations for both sides just as in the real battle.
The British initial dispositions under the command of Carl. 

The French under the command of Tom defending their hill. 

The British start their advance but the small central brigade fall behind straight away.


The French wait patiently on their hill. 


Once again the British centre fails to move as their colleagues press on. 


French cavalry form into column with the intention of marching to the right flank. 


The 14th Light Dragoons advance as their KGL comrades are disordered crossing the terrain.


As the French cavalry became disordered there was no movement on the ridge so the British moved again with the cavalry continuing their flank march and the centre brigade finally on the move.


French Dragoons finally continue their move across to the right. French artillery open fire causing a casualty on the British skirmish line.. 


The British advance stalls but their skirmishers open fire causing a casualty


 Also on the right flank.


The French attempt to deploy their infantry into line but blunder into the adjacent battalion. 


British artillery fires on the French line causing one casualty.


Accurate French skirmisher fire causes casualties amongst the British and Portuguese  light units.


We used the bounce through rule from AT2 in this game. 


French 8ibr. 


British cavalry Brigade with 1st Hussars KGL (Perry plastics) and the newly painted 14th Light Dragoons (Brigade games) 


British artillery target the French line on the ridge. 


Brunswick Oels fire effectively at the French skirmishers. 


The other British battery  joins in the fun.


With the British cavalry remaining stalled on the left flank the French skirmish line  are left free to fire at their British counterparts.


French infantry deployed in line on the left flank. 


Bounce through is more effective this time causing casualties and disorder amongst the British column. 


British columns advance towards the French who have all deployed into line while their skirmishers attempt to drive off the French skirmish screen.


Skirmish screens continue to exchange fire. 


French skirmishers pushed back behind their line. 


14th Light Dragoons. 


French blunder causing the unit to fall back. 


Column and line face off. 


First melee of the game. 


The British advance in the centre. 


A unit of French skirmisher s is the first to be lost. 


 Closing fire from the French line leaves the British disordered.


The French lose this one by 2. 


but carry on fighting. 


French cavalry crossing the ridge. 


British cavalry finally line up ready to menace the French flank. 


Having recovered from disorder the British engage in a firefight with the French. 


 The melee on the British right flank continues.


This time the French run away in fine style. 


The British follow through into the next French line. Closing fire on both units results in casualties.


 Further along the line the British also charge.


While their skirmishers attack the artillery. 


The British lose the follow through melee and one unit is thrown back. 


At close of play the British had gained a foothold on the ridge but as usual on club nights we were 1 move short of achieving a likely result to the game!


Rules were Black Powder and AT1.

Thanks for looking. 


Thanks For Reading


Mick