Showing posts with label 28mm Buildings. Show all posts

Saturday, 25 June 2016

Making a 28mm Normandy building.

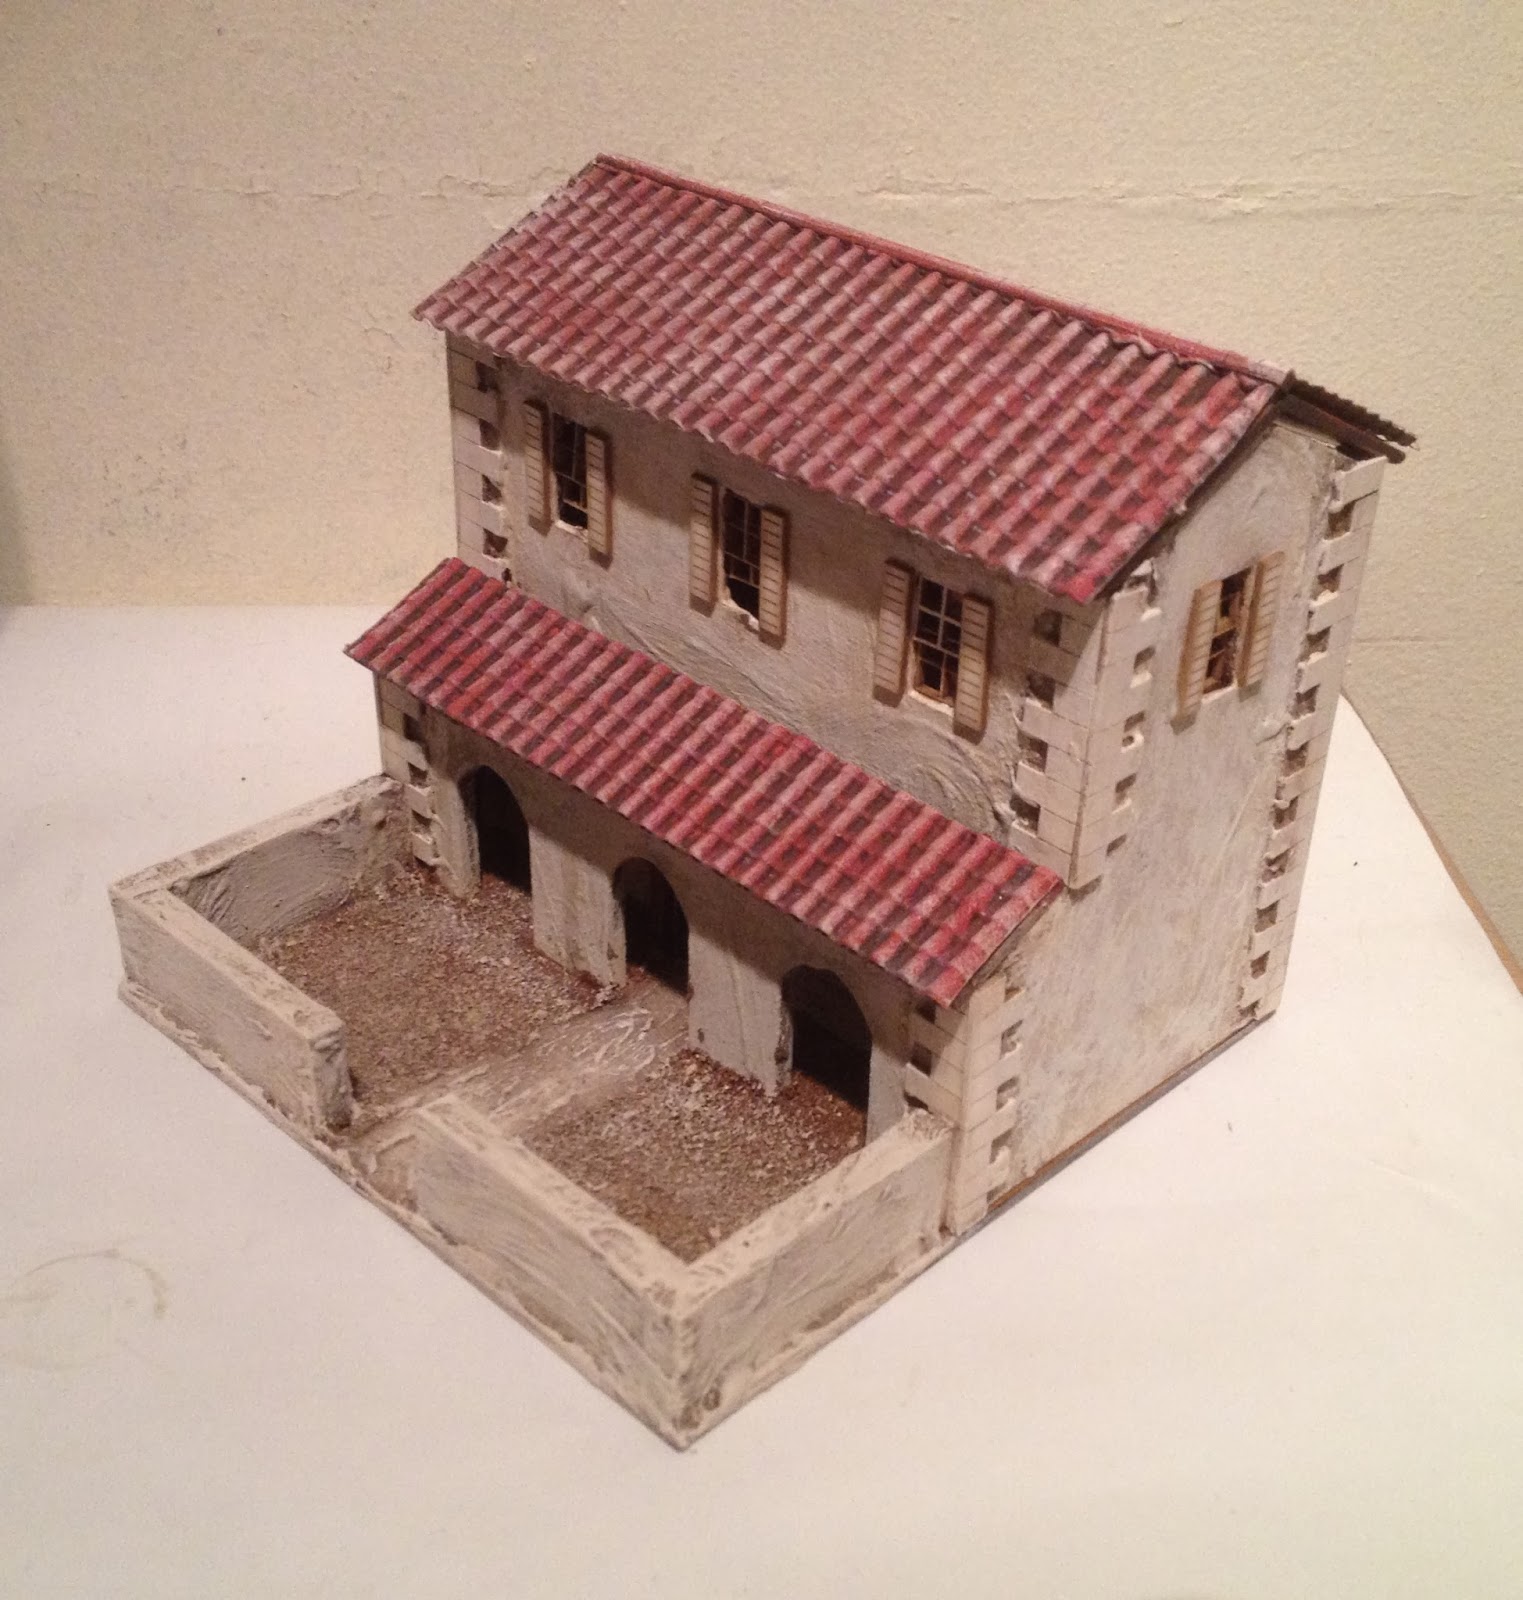
A couple of lads who used to come to the 'Reivers' club have got into Bolt Action and they asked if we could do some Normandy buildings for them. They were researched using the internet and some very useful then and now photos. Also Saving Private Ryan and Band of Brothers  type films and programmes proved very useful. This model is bassed on a building from the latter.

All parts were made from Mdf.  This is what we came up with-

Four pieces make up the roof supports

Two dormer windows will slot into the roof.


3 parts make up the chimney.


The internal floor has a wall to make removing it easier. This is all the internal detail they wanted.


The windows were added to the walls before the walls were glued together.


Additional detail is added to the chimney.


The first of the roof sides is added to the frame.


The second is added.


Dormers are glued into place.


The chimney and dormer roof sections are then added.


The walls are glued together and added to the base.


The floor supports are glued into place in each corner.


Doors are postioned along with the ridge tiles and the two chimney pots to complete the model.


I have 14 Normandy buildings done for them and the lads are wanting a couple of specials like church, chateau or cafe types which i will get done soon. Fortunately they seem pretty pleased with them, so much so that they now want ruined versions too!!!!

A few of other buildings-


Wednesday, 7 May 2014

28mm Roman villa and Ludus.

Gladiator school 
We are planning on getting some Gladiators and a rules set, possibly at Carronade this Saturday, so i thought i would make a Ludus attached to villa as a nice backdrop to the games.

This is the first version. Most of the buildings have side windows which i will remove from the next version so they can butt up against each other which i think will look better. The wall arrangement will also need to be altered as a result.
The villa from the front. 


Store room and servants quarters. 


The back of the villa showing the grandstand overlooking the combat arena and the cell blocks. 


Store room and servants quarters from inside. 


The rear of the main villa building. 


These building represent the main Gladiator cell block with 2 similar blocks representing the armoury and the champion Gladiators cell. 


The arena could be made bigger if required but this the model as it is now.  Materials used were 2mm MDF, styrene pantiled roof sheets from the US and some mount board.


Friday, 28 February 2014

Spanish Municipal building.

This model will be a replacement for a one i built and sold on ebay to raise  some cash for figures. I may make 2 and sell the duplicate on ebay at some point. 

The walls glued and secured by elastic bands with the roof sub frame glued in situ to get the right pitch. 


The courtyard wall prepared  for later. 

The internal floors cut to size and the baseboard with the engraved courtyard area. 


This is the one i sold and the intention is to duplicate this in most respects. 


I will update this over the weekend as Carl has added plaster and paint to the model. 


Sunday, 16 February 2014

28mm Spanish Taverna

Taverna 


Having sold my previous set of buildings to raise some fund for new toys i will be wanting in the near future its time to make more . First up will be a Taverna followed by some houses, a Municipal building and a villa.

Materials used are MDF, card and plastic pantile roof sheets. Render is simply white filler with brown paint added so that any chipping wont reveal white bits.

Carl has been helping with all of these projects for once, probably has an ulterior motive in wanting me to make some 40k buildings!
Having cut out the windows and doors the walls are glued together. 


Card corner stonework added. 


Arched front piece added and card corners added. 


The brown render has been added. 

The back. 

First coat of masonry paint, Homebase toffee cream then Sandtex Ivory stone on top. 


Windows added with some open for variety and mounted on its base.


The walls added and textured with plaster used for the path. Roof sections added and Santex Hot brick brushed over a dark chocolate undercoat.


First dry brush of the roof and the garden walls with Toffee cream. Shutters added to windows.Texture added to the garden. This was simply dried out tea from tea bags. These have also been highlighted. 


Final highlight of Ivory stone with static grass and a couple of tables added.


The finished model with some rope hanging from the wall. 


I have done two of these, one for my own use and the second is on Ebay Link. Selling these duplicates helps fund new toys and a big order for Calpe is on the horizon together with an order to Mabuhay painting service for a brigade of Austrians which i just cant face painting!


This is similar to the villa i will be doing for my own use. This one has just been sold on Ebay so i need another for my own games.


I'll be doing updates for this during the week and hope to have it finished by Friday

Thanks for looking.

Mick